
Webex
Your Webex account has a Personal Meeting Room that can be used as an online office or conference space. Your Personal Meeting Room has a simple link that never changes, in general using this format: https://coloradocollege.webex.com/meet/username (replace username with your own CC username).
If you might not be able to attend your scheduled Webex meeting, Webex lets you Set an Alternate Host to allow someone else run the meeting on your behalf.
Setup Webex
Download Webex for: Mac, PC, Android & iOS, Chrome extension. On Mac, we recommend also downloading the Webex Productivity Tools to create Webex meetings directly from Outlook.
- Run or open the installation file and follow the instructions.
- Launch Webex and enter your CC email when prompted.
- CC login page should display, please log in as usual with your CC username and password.
If you are requested to enter your organization's Webex URL during setup, please enter: coloradocollege.webex.com
Start a Meeting
- Open your Webex app. Find the scheduled event on the list and click Start or click Start a Meeting to start impromptu meeting in your personal meeting room.
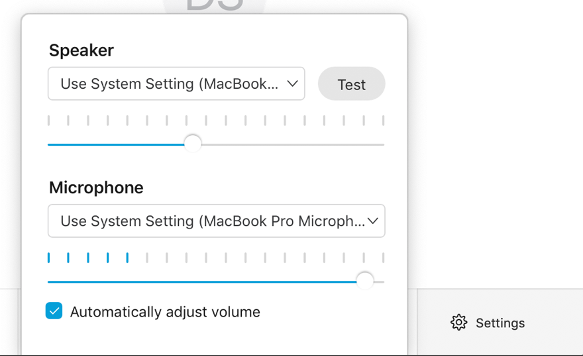
- Before entering your meeting, setup and test your audio options by selecting Settings in the bottom right:
- Choose different speaker and microphone options in the drop-down menus.
- Test speakers and speak into microphone to verify everything is working.
- When you are ready, go ahead and click Start Meeting.
Call In Alternative
You can alternatively call into the meeting instead of using computer's speakers and microphone.
- Before entering your meeting, click the computer/phone audio option in the middle on the bottom toolbar.
- Select Call in, then Start Meeting. You should now see instructions for how to call into the meeting from your phone.
Manage Participants
On the top toolbar, select Participants to:
- Mute Participants on Entry
- Turn on or off "Anyone Can Share in meeting"
Open the Participant panel ![]() , then click or right-click on user's name to:
, then click or right-click on user's name to:
- Change Role to:
- Presenter - Allow them to share screen or content
- Host - Allow them to control meeting and keep meeting active if you need to leave
- Allow to Annotate - Lets them draw on shared screen or whiteboard
- Mute/Unmute the individual or all participants
- Chat - Send text chat directly
- Move to the Lobby - Send to waiting room outside of meeting - they will remain there until you re-admit them
- Expel - Remove user from the meeting completely
Share Screen
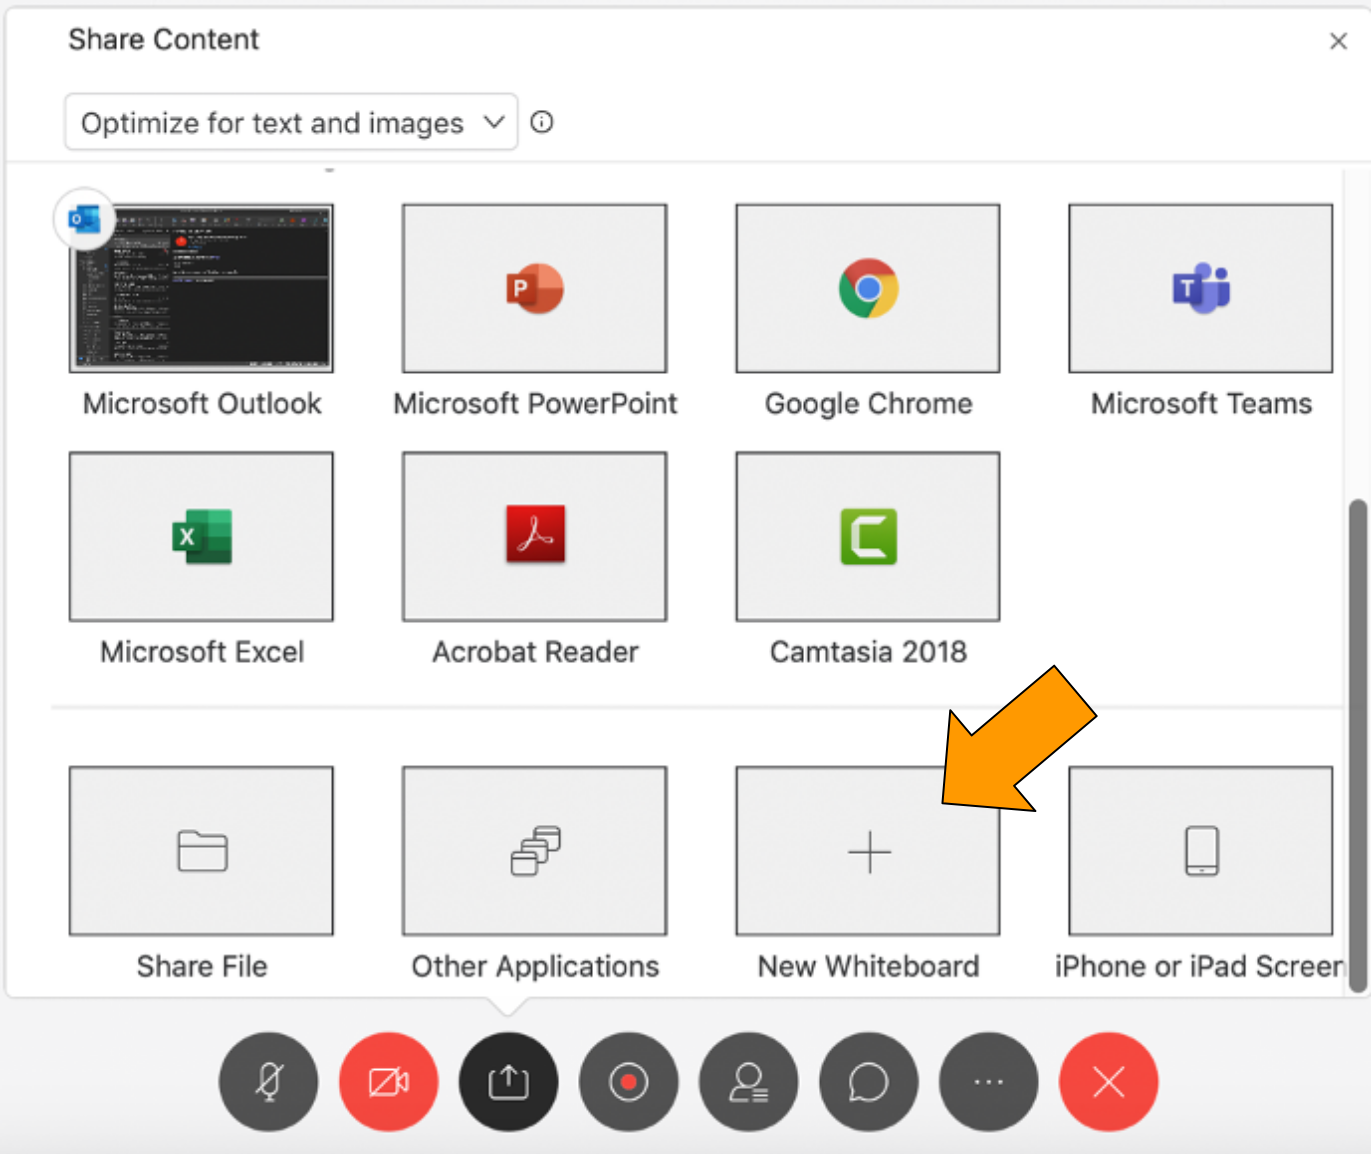
- Click Share content icon
 on the meeting toolbar. You can scroll down on menu to see all options.
 - Select a screen or app to share with participants.
An orange frame will highlight what content you are sharing. To access the toolbar when sharing content, move your cursor to the top of the screen onto the orange bar to reveal a toolbar.
The toolbar will give you options to stop or pause sharing, assign others to share, annotate, as well as the standard tools. Annotate will give you drawing tools that let you annotate directly on your shared content.

Polling
Polling tool will let you create basic questions for your participants to answer to gather feedback or check for comprehension.
- Click More Options icon
 and select Polling. This will open up Polling panel on your right.
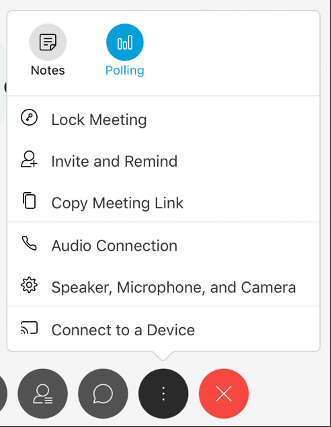
- On Polling panel, click Add New Question icon
 to enter question, then click Add New Answer icon
  to enter possible responses.
- You will have an option to change question type to "Multiple Answers" or "Short Answer"
- Repeat this process to add additional questions & answers.
- When you are ready, select Open Poll. By default, the poll will be open for responses for 5:00 minutes.
Save Poll Results
After you close a Poll, you can save Poll results to view later by going to File > Save > Poll Results (found on the top toolbar). This will save responses to a text file that you can view later.
Create Polls in Advance
Webex does not have a separate tool to create Poll questions in advance. You can either:
- Create Poll questions before class by entering meeting early OR
- You can enter an empty meeting at any time then create a Poll to use later. Save the Poll by clicking the download button
 in the Pollling panel.
To load a saved Poll, click File icon ![]() in Polling panel to locate file and open.
in Polling panel to locate file and open.
Record & Share
- During the meeting, select Recorder icon
 on bottom toolbar. Click Record to start.
- If needed, click Record icon again to Pause or Stop meeting recording.
- Once meeting has ended, log in online to retrieve and share recording: https://coloradocollege.webex.com/
- Go to the Recordings tab and click the recording name to review it.
- Note: Recordings may take extra time to process before becoming available online.
- Click Sharing icon
 next to recording to share with others. You can send recording directly via email or give them a link with the recording password. There is also an option to download the recording as an MP4 file.
Recording settings can be found on your account online (https://coloradocollege.webex.com/) under Preferences > Recordings.
Chat
Click chat icon ![]() on toolbar to expose Chat panel. You can choose to message everyone or pick an individual from the drop-down list to message someone directly.
on toolbar to expose Chat panel. You can choose to message everyone or pick an individual from the drop-down list to message someone directly.
Whiteboard
After clicking Share Content icon ![]() , scroll down to the bottom of this menu to find New Whiteboard.
, scroll down to the bottom of this menu to find New Whiteboard.
Here's a video on Canvas and Webex.